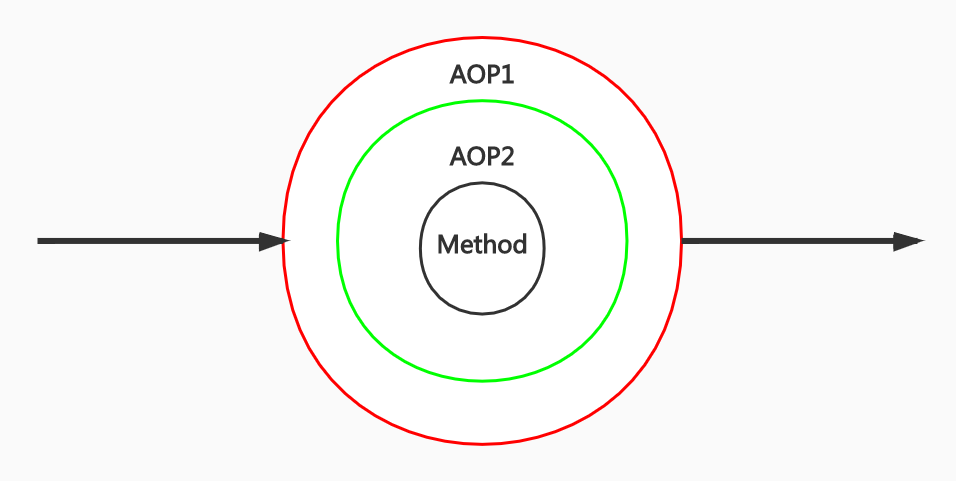
自定义注解方式实现日志aop
本文最后更新于 2024-04-01,欢迎来到我的Blog! https://www.zpeng.site/
自定义注解方式实现日志aop
1.步骤
在Spring Boot中实现自定义注解通常涉及以下步骤:
定义注解:创建一个带有
@Target、@Retention和@Documented注解的注解。创建切面(Aspect):使用Spring AOP,编写一个切面类,该类将包含注解处理的逻辑。
配置切面:在Spring配置中声明切面,以便Spring能够识别并应用它。
2.依赖
        <dependency>
            <groupId>eu.bitwalker</groupId>
            <artifactId>UserAgentUtils</artifactId>
            <version>1.21</version>
        </dependency>
        <dependency>
            <groupId>javax.servlet</groupId>
            <artifactId>javax.servlet-api</artifactId>
            <version>4.0.1</version>
            <scope>provided</scope>
        </dependency>
        <dependency>
            <groupId>org.springframework.boot</groupId>
            <artifactId>spring-boot-starter-aop</artifactId>
            <scope>test</scope>
        </dependency>
        <dependency>
            <groupId>org.aspectj</groupId>
            <artifactId>aspectjweaver</artifactId>
        </dependency>
        <dependency>
3.实现
自定义注解Log
package com.example.useragent.demos.web;

import java.lang.annotation.*;

@Target({ElementType.METHOD, ElementType.TYPE})
@Retention(RetentionPolicy.RUNTIME)
@Documented
public @interface Log {
    String value() default "";
}
创建日志切面LogAspect
package com.example.useragent.demos.web;


import eu.bitwalker.useragentutils.Browser;
import eu.bitwalker.useragentutils.OperatingSystem;
import eu.bitwalker.useragentutils.UserAgent;
import org.aspectj.lang.ProceedingJoinPoint;
import org.aspectj.lang.annotation.Around;
import org.aspectj.lang.annotation.Aspect;
import org.aspectj.lang.annotation.Pointcut;
import org.springframework.stereotype.Component;
import org.springframework.web.context.request.RequestContextHolder;
import org.springframework.web.context.request.ServletRequestAttributes;

import javax.servlet.http.HttpServletRequest;

@Aspect
@Component
public class LogAspect {

    @Pointcut("@annotation(com.example.useragent.demos.web.Log)")
    public void logPointCut() {
    }

    @Around("logPointCut()")
    public Object aroundAdvice(ProceedingJoinPoint joinPoint) throws Throwable {
        // 在目标方法执行前执行的逻辑
        System.out.println("Before method execution");


        ServletRequestAttributes attributes = (ServletRequestAttributes) RequestContextHolder.getRequestAttributes();
        String ip = getIpAddr(attributes.getRequest());
        UserAgent userAgent = UserAgent.parseUserAgentString(attributes.getRequest().getHeader("User-Agent"));
        //Mozilla/5.0 (Windows NT 10.0; Win64; x64) AppleWebKit/537.36 (KHTML, like Gecko) Chrome/123.0.0.0 Safari/537.36

        //获取浏览器对象
        Browser browser = userAgent.getBrowser();
        //获取操作系统对象
        OperatingSystem operatingSystem = userAgent.getOperatingSystem();

        System.out.println("浏览器名:" + browser.getName());
        System.out.println("浏览器类型:" + browser.getBrowserType());
        System.out.println("浏览器家族:" + browser.getGroup());
        System.out.println("浏览器生产厂商:" + browser.getManufacturer());
        System.out.println("浏览器使用的渲染引擎:" + browser.getRenderingEngine());
        System.out.println("浏览器版本:" + userAgent.getBrowserVersion());

        System.out.println("操作系统名:" + operatingSystem.getName());
        System.out.println("访问设备类型:" + operatingSystem.getDeviceType());
        System.out.println("操作系统家族:" + operatingSystem.getGroup());
        System.out.println("操作系统生产厂商:" + operatingSystem.getManufacturer());
        System.out.println("ip:" + ip);

        // 执行目标方法
        Object result = joinPoint.proceed();

        // 在目标方法执行后执行的逻辑
        System.out.println("After method execution");

        // 返回方法执行结果
        return result;
    }

    /**
     * 获取客户端IP
     *
     * @param request 请求对象
     * @return IP地址
     */
    public static String getIpAddr(HttpServletRequest request) {
        if (request == null) {
            return "unknown";
        }
        String ip = request.getHeader("x-forwarded-for");
        if (ip == null || ip.length() == 0 || "unknown".equalsIgnoreCase(ip)) {
            ip = request.getHeader("Proxy-Client-IP");
        }
        if (ip == null || ip.length() == 0 || "unknown".equalsIgnoreCase(ip)) {
            ip = request.getHeader("X-Forwarded-For");
        }
        if (ip == null || ip.length() == 0 || "unknown".equalsIgnoreCase(ip)) {
            ip = request.getHeader("WL-Proxy-Client-IP");
        }
        if (ip == null || ip.length() == 0 || "unknown".equalsIgnoreCase(ip)) {
            ip = request.getHeader("X-Real-IP");
        }

        if (ip == null || ip.length() == 0 || "unknown".equalsIgnoreCase(ip)) {
            ip = request.getRemoteAddr();
        }
        return ip;
    }
}
配置切面
import org.springframework.context.annotation.Configuration;
import org.springframework.context.annotation.EnableAspectJAutoProxy;

@Configuration
@EnableAspectJAutoProxy
public class AppConfig {
    // 配置类内容(如果有需要添加bean定义等)
}
在Spring Boot应用中使用
package com.example.useragent.demos.web;

import org.springframework.stereotype.Controller;
import org.springframework.web.bind.annotation.RequestMapping;
import org.springframework.web.bind.annotation.RequestParam;
import org.springframework.web.bind.annotation.ResponseBody;

@Controller
public class BasicController {

    // http://127.0.0.1:8080/hello?name=hello
    @RequestMapping("/hello")
    @ResponseBody
    @Log
    public String hello(@RequestParam(name = "name", defaultValue = "unknown user") String name) {
        return "Hello " + name;
    }
}
访问http://127.0.0.1:8080/hello?name=hello
输出结果
Before method execution
浏览器名:Chrome 12
浏览器类型:WEB_BROWSER
浏览器家族:CHROME
浏览器生产厂商:GOOGLE
浏览器使用的渲染引擎:WEBKIT
浏览器版本:123.0.0.0
操作系统名:Windows 10
访问设备类型:COMPUTER
操作系统家族:WINDOWS
操作系统生产厂商:MICROSOFT
ip:127.0.0.1
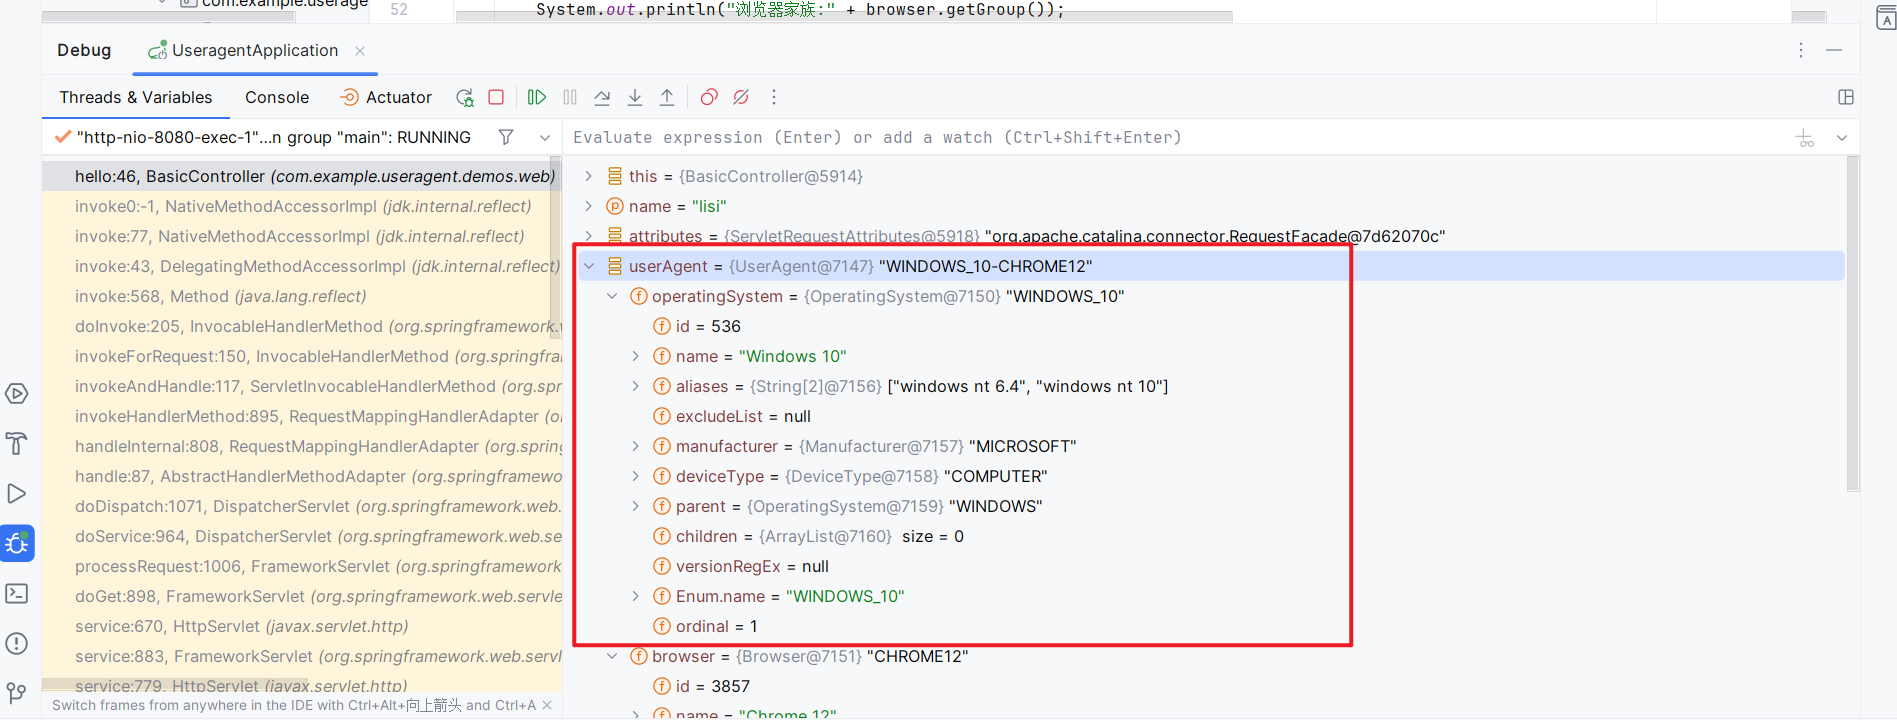
After method execution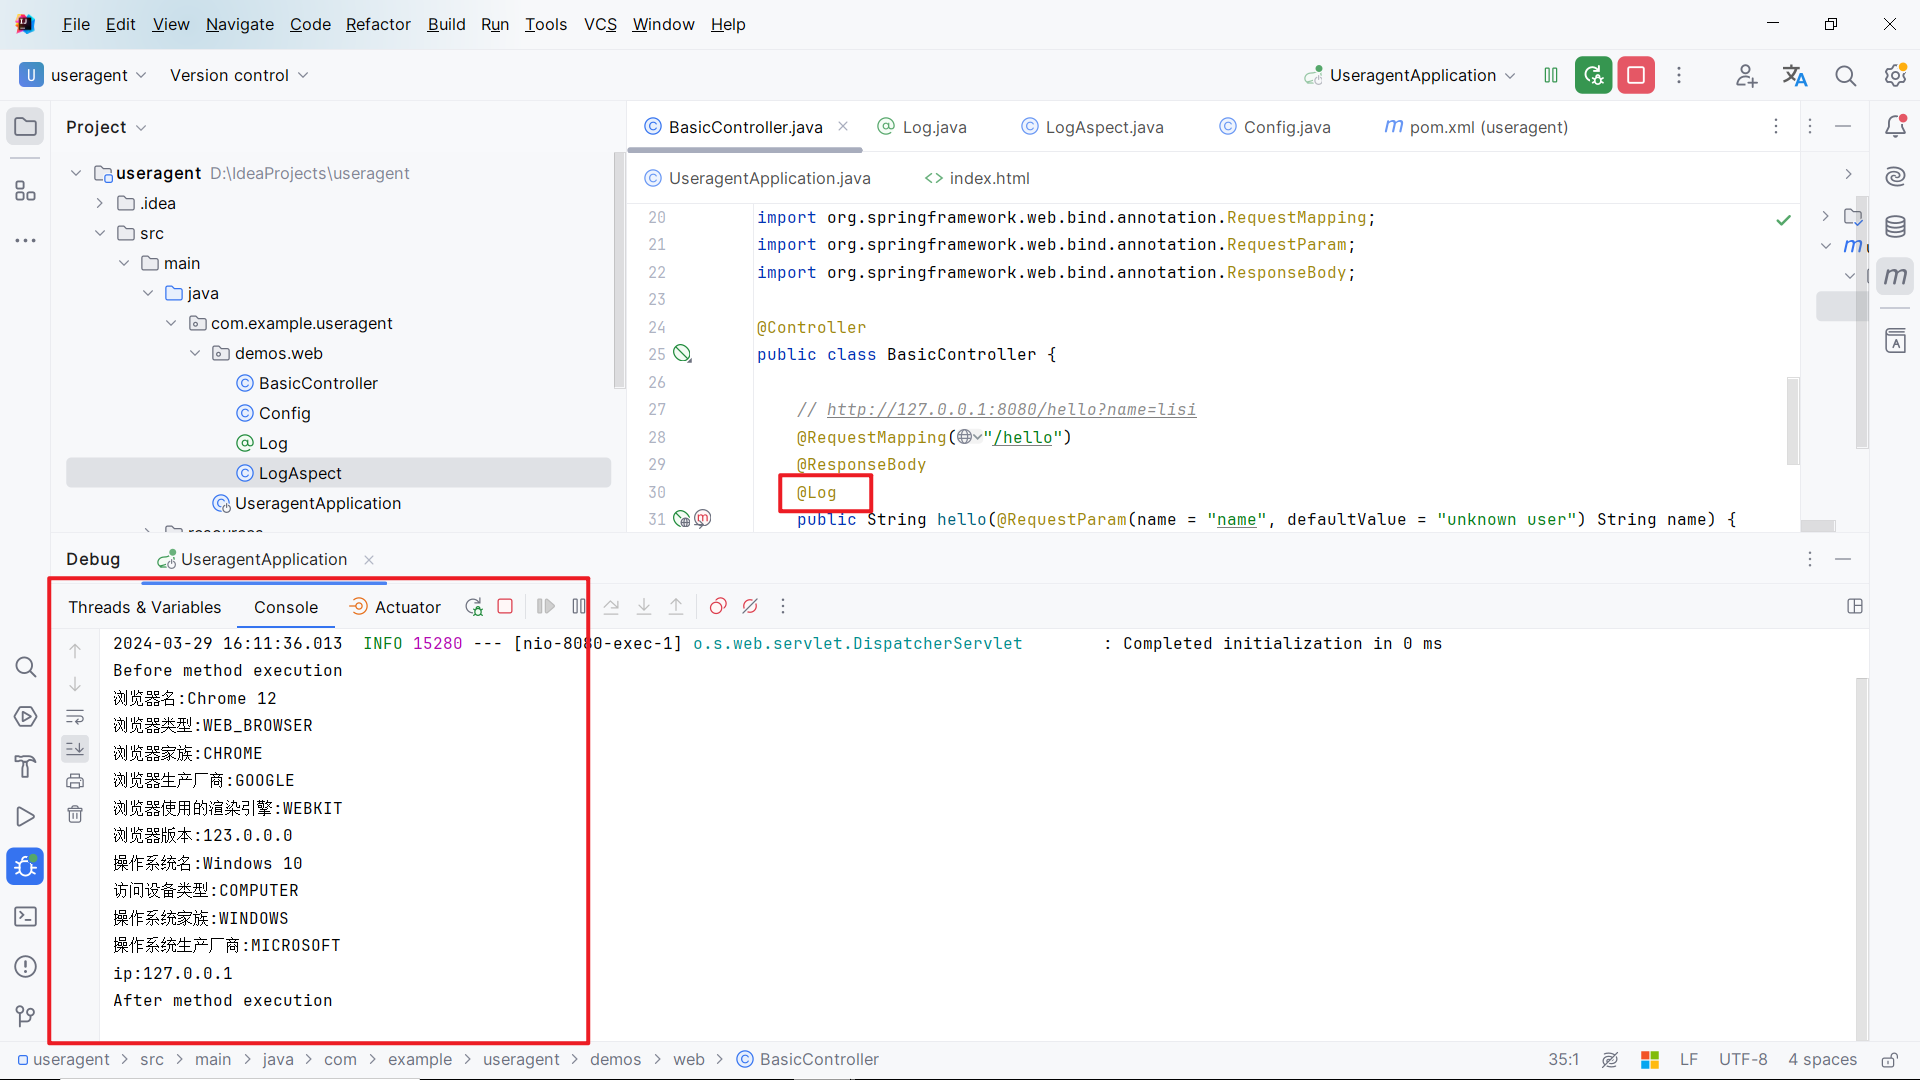 确保Spring Boot应用的主类上有@SpringBootApplication注解,它会自动扫描并应用切面配置。当你访问/hello端点时,LogAspect 中定义的aroundAdvice方法会根据注解的存在来执行预定的逻辑。
4.览器解析工具--UserAgentUtils
4.1User-Agent介绍
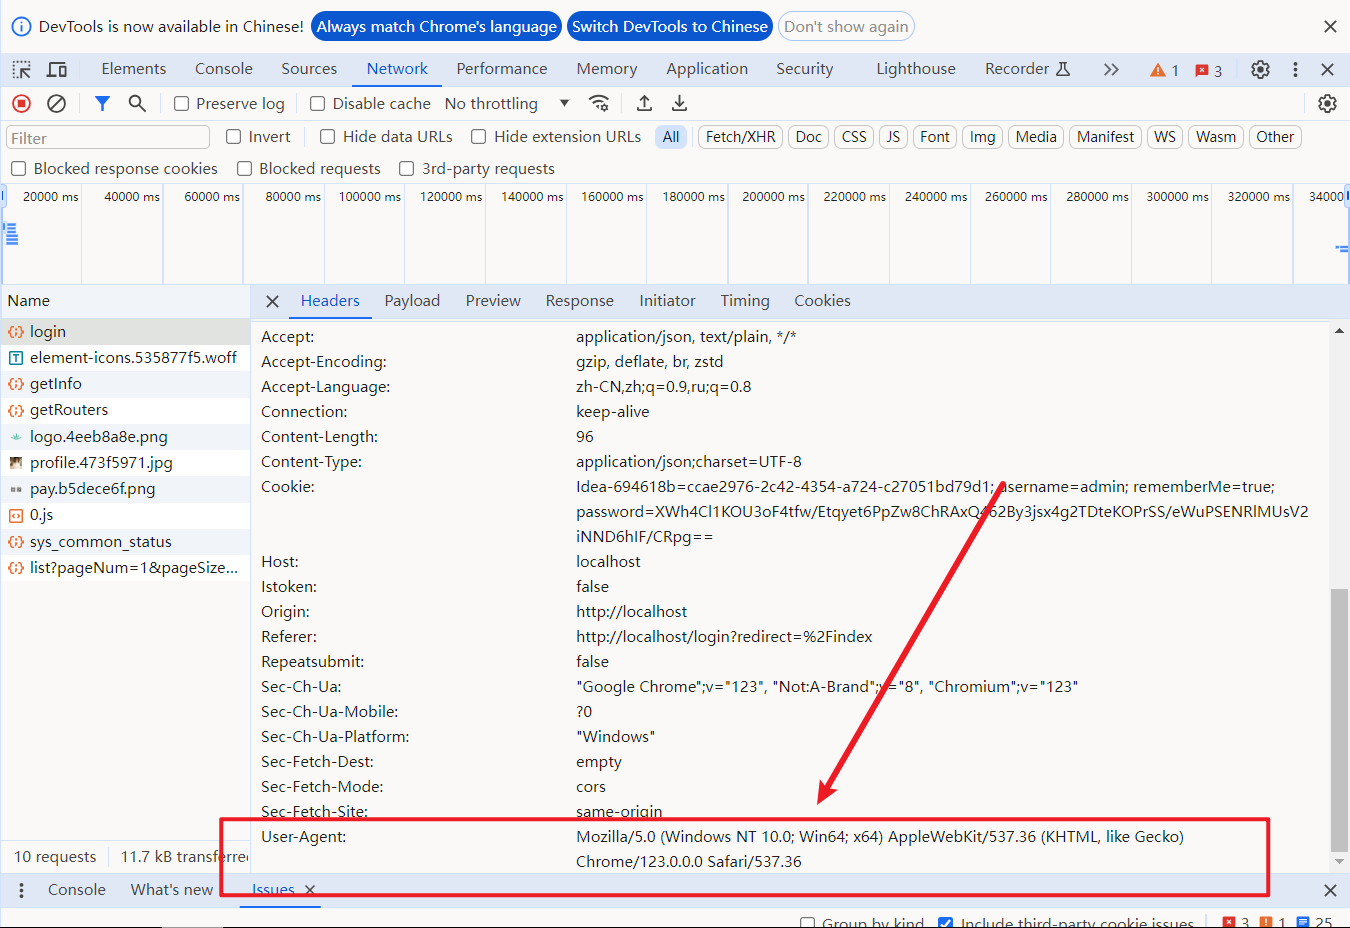
Mozilla/5.0 (Windows NT 10.0; Win64; x64) AppleWebKit/537.36 (KHTML, like Gecko) Chrome/123.0.0.0 Safari/537.36
User-Agent(用户代理)是一个特殊字符串头,在HTTP请求中用于标识发送请求的客户端应用或设备。它包含了关于客户端的信息,如操作系统、浏览器、设备型号等。User-Agent的主要作用如下:
客户端识别:通过User-Agent,服务器能够识别客户端的类型和版本,从而提供相应的内容和服务。例如,在移动设备上展示适合屏幕大小的网页布局,或在不同浏览器上提供兼容性优化。
统计分析:网站和应用开发者可以利用User-Agent来收集客户端的信息,进行用户行为分析和统计。这有助于了解用户使用的设备和偏好,以便进行产品和服务的改进。
安全性:User-Agent也可以用于安全验证和防止恶意行为。通过分析User-Agent,服务器可以检测到异常或伪造的请求,并采取相应的安全措施。
User-Agent参数的具体字段包括:
产品名称:表示发出请求的应用程序或浏览器的名称,例如Mozilla、Chrome、Safari等。
产品版本号:表示应用程序或浏览器的具体版本,例如5.0、58.0.3029.110等。
系统信息:通常包含在括号内,提供了关于客户端运行的操作系统和其他环境的信息,例如(Windows NT 10.0; Win64; x64)。
兼容性声明:有时出现“compatible”字样,表明客户端尝试与某些标准或系统兼容。
请注意,不同的浏览器和设备可能会有不同的User-Agent字符串格式和内容。因此,在处理User-Agent参数时,应考虑到不同客户端之间的差异,并进行适当的解析和处理。
 4.2user-agent-utils介绍
user-agent-utils 是一个用来解析 User-Agent 字符串的 Java 类库
        <dependency>
            <groupId>eu.bitwalker</groupId>
            <artifactId>UserAgentUtils</artifactId>
            <version>1.21</version>
        </dependency>
使用方法如上
        ServletRequestAttributes attributes = (ServletRequestAttributes) RequestContextHolder.getRequestAttributes();
        UserAgent userAgent = UserAgent.parseUserAgentString(attributes.getRequest().getHeader("User-Agent"));
        //Mozilla/5.0 (Windows NT 10.0; Win64; x64) AppleWebKit/537.36 (KHTML, like Gecko) Chrome/123.0.0.0 Safari/537.36

        //获取浏览器对象
        Browser browser = userAgent.getBrowser();
        //获取操作系统对象
        OperatingSystem operatingSystem = userAgent.getOperatingSystem();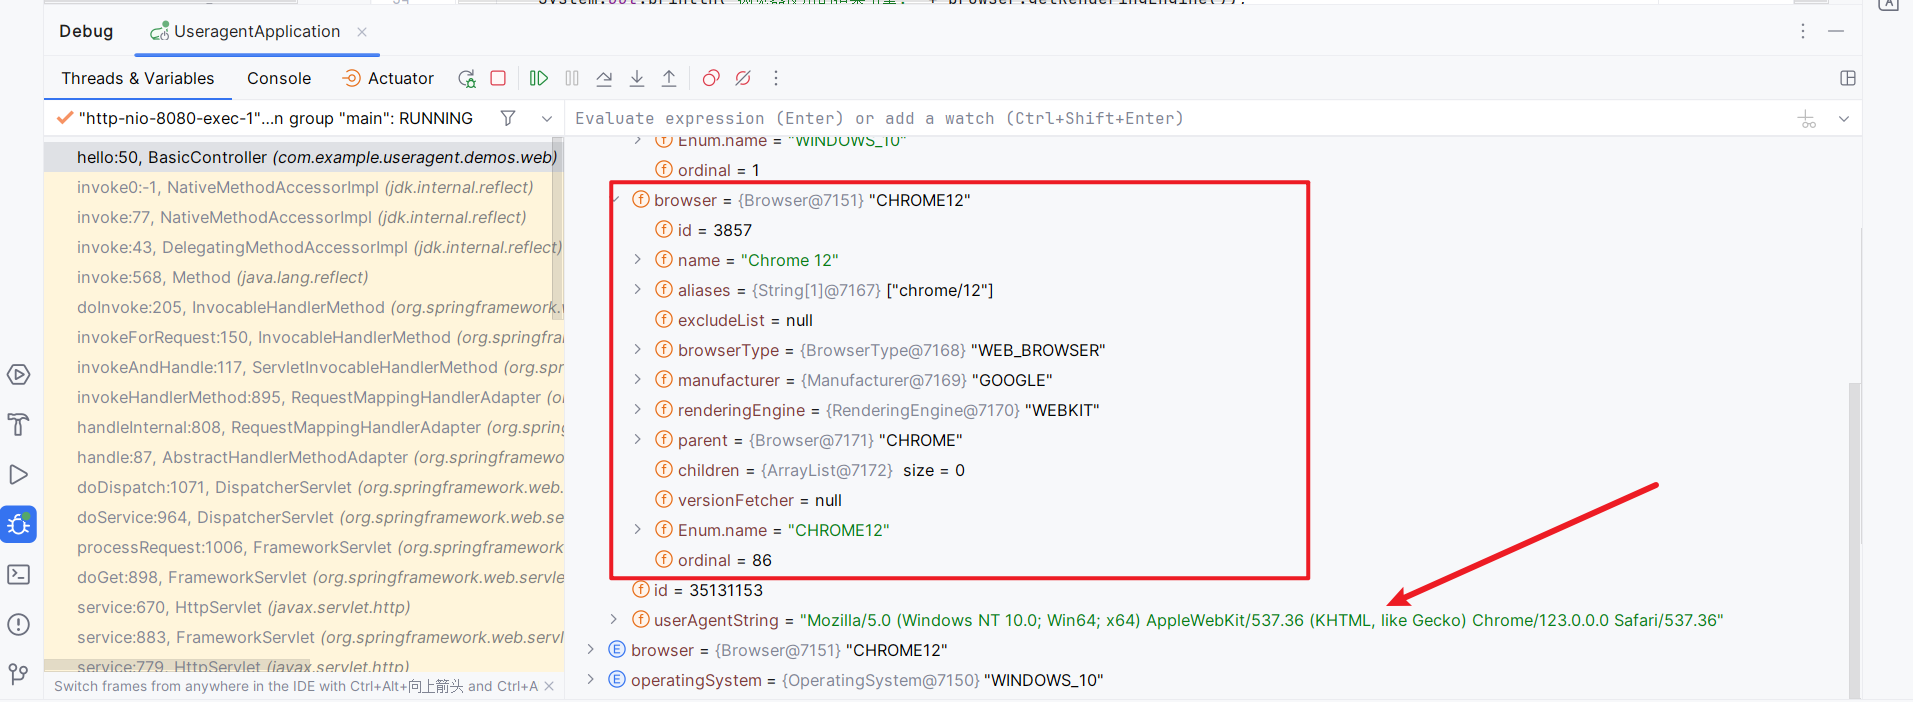
- 感谢你赐予我前进的力量


